01 Oct How to Winterize a Paint Sprayer or Line Striping Machine
How to Winterize a Paint Sprayer or Line Striping Machine
Learning How to Winterize a Paint Sprayer or Line Striping Machine is critical for maintaining its functionality and durability. This guide will cover the essential steps on how to winterize a paint sprayer, effectively reducing maintenance costs and avoiding operational downtime. Follow these instructions to save on repairs and ensure your equipment is ready to perform when the painting season resumes.
Step 1: Pressure Relief Initiate the winterization of your paint sprayer by conducting a pressure relief procedure:
- Activate the safety lock on the spray gun.
- Switch the machine to the off position.
- Adjust the pressure control to the lowest setting.
- Rotate the spray tip for cleaning and unlock the safety mechanism on the gun.
- Discharge any internal pressure by triggering the gun against a grounded metal container.
- Reactivate the safety lock on the gun.
- Set the prime spray valve to the prime setting.
Step 2: Flushing the System With the pressure relieved, proceed to flush the paint sprayer:
- Detach the spray tip and guard, soaking them in a suitable solvent (water for water-based paints or mineral spirits for oil-based paints).
- Remove and clean all filters in the appropriate solvent.
- Disconnect and clean the siphon hose and drain tube from any paint residue.
- Submerge the siphon hose in a cleaning solution tailored to your paint type.
- Position the drain tube into a disposal container.
- Switch the prime spray valve to “prime.”
- Power on the sprayer, gradually increasing the pressure until the cleaning fluid begins to flow through the hose. Maintain control to prevent spills.
- Direct the gun into the disposal container, pulling the trigger while shifting the valve to “spray.”
- Increase pressure as you continue to activate the gun until the solvent flows clearly, indicating the system is clean.
- Empty the remaining solvent by removing the siphon hose from the solution and activating the sprayer.
- Power down the machine.
Step 3: Winterizing the Paint Sprayer For the actual winterization, similar steps are followed without draining the final solution:
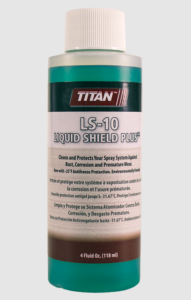
- Immerse the siphon tube in approximately 1 liter of a preferred winterizing solution like Graco’s Pump Armor, Titan’s LS-10 Liquid Shield Plus, or mineral spirits.

Titan Liquid Shield Plus
- Direct the drain tube into a disposal container.
- Set the prime spray valve to “prime.”
- Start the sprayer, slowly increasing pressure until the solution flows.
- When the solution is visible in the drain tube, turn off the sprayer. Use colored solutions for easy identification.
- Switch the valve to “spray,” sealing the system to prevent corrosion.
- Cover the intake tube with a plastic bag, securing it to avoid leakage.
- For gasoline engines, consult the manufacturer’s manual for winterization and drain all fuel, running the engine until it stops.
Storage and Additional Cleaning Ideally, store your paint sprayer in a dry, warm location to prevent damage. If outdoor storage is unavoidable, ensure it is well-covered. Additionally, thoroughly clean filters, tips, and guards to prepare for prolonged storage.
By following this guide on how to winterize a paint sprayer, you safeguard your equipment against the cold, ensuring it remains in top condition for the next use season. Regular maintenance and adherence to the manufacturer’s instructions will further enhance your paint sprayer’s efficiency and longevity.


Sorry, the comment form is closed at this time.